
LiFePO4 Australia Technical Support
RUIXU Lithi2-16 RX07 firmware update guide
Follow the steps below to connect your Lithi2-16 to a Windows computer, select the RX07 firmware file, install it and check the result.
Updated 26 October 2026
The update sequence: Connect → read battery data → stop monitoring → open the firmware file → Download → confirm success → read the version again.
Before you start
Confirm RX07 compatibility with LiFePO4 Australia or RUIXU using your battery serial number and BMS hardware details. Record the existing software version and inverter setting on each battery.
- A Windows laptop with enough power for the entire update and sleep disabled.
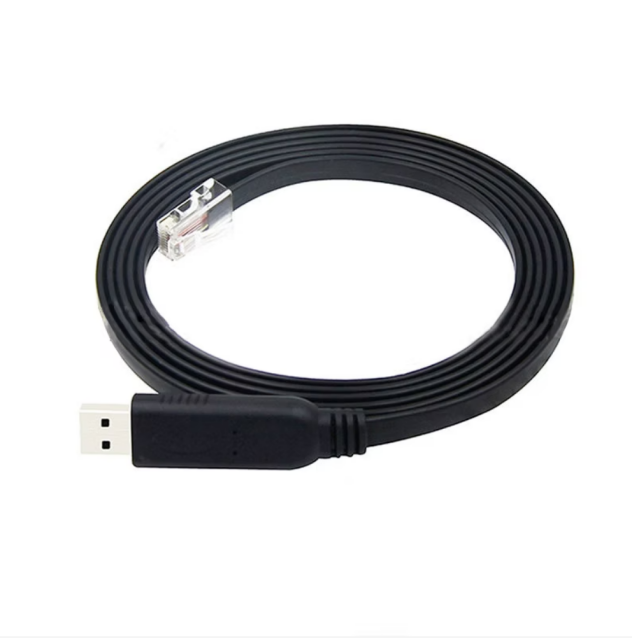
- A RUIXU USB-to-RS485 cable with USB at the computer end and an RJ45 plug at the battery end. Buy the cable for $35 including GST and shipping. If you purchased your RUIXU batteries from LiFePO4 Australia, email [email protected] with your battery order details to request a free cable for manual approval.
- RuiXUTools and the cable driver. Contact us for the matching package. Extract the ZIP to a folder before opening the program.
- The RX07 firmware file:
APP_450300481_51V314AH_RX07.bin. Save it somewhere easy to find, such as Downloads. - The approved isolation and restart instructions for your installation. Arrange these with your installer before starting.
Download RUIXU’s illustrated firmware upgrade steps (Word)
The .bin file is opened from inside RuiXUTools. You do not double-click it to install the update.
Install the USB driver
The supplied RUIXU instructions identify CDM21224_Setup.exe as the driver installer. Run the driver supplied for your RUIXU cable and complete its installation.
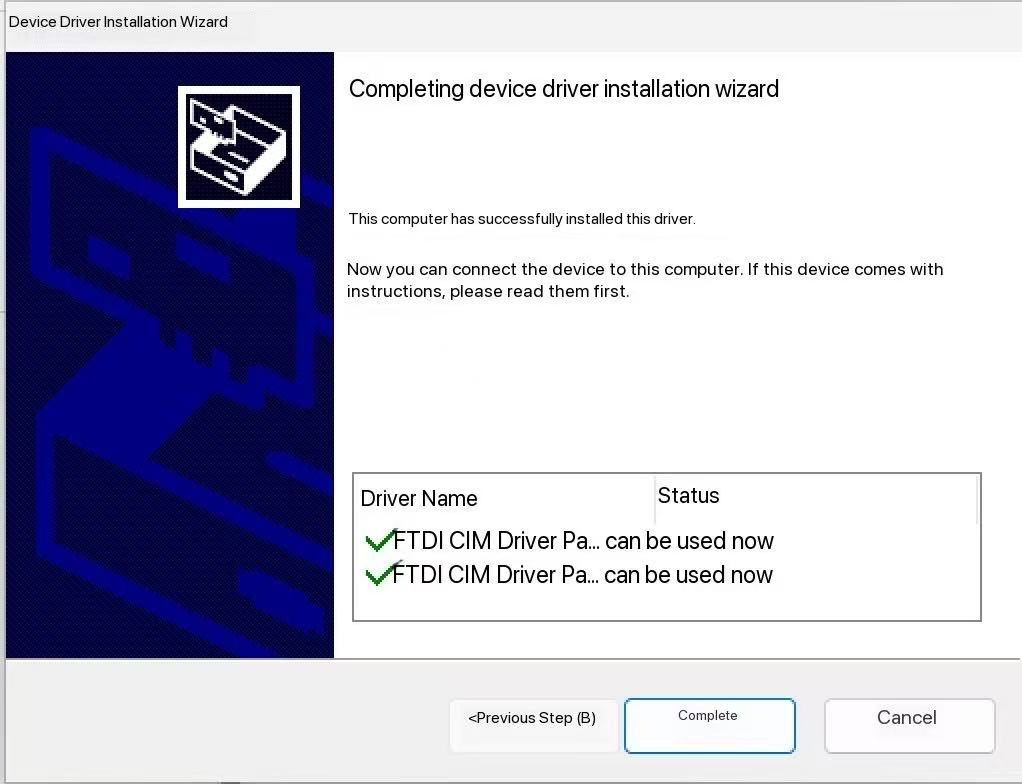
A customer using RuiXUTools v1.04 found that its package did not include the driver and used the driver included with v1.03. If your package has no driver, obtain it from support before continuing.
1. Connect the battery and computer
- Follow your installation’s approved update preparation and isolation sequence.
- Connect the RUIXU cable’s RJ45 plug to the master battery’s OUT communication port, following RUIXU’s connection instructions. Connect its USB plug to the laptop.
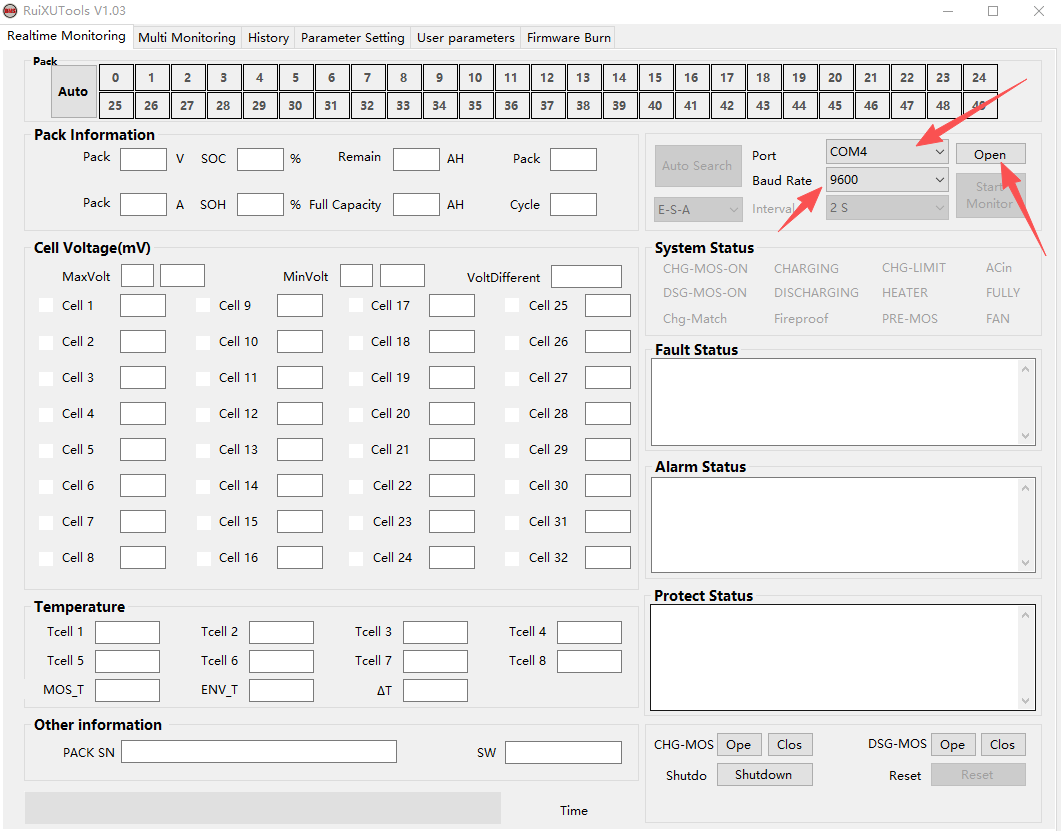
- Open Windows Device Manager → Ports (COM & LPT). Find the USB adapter and note its COM number, for example COM4.
- Open BMS_TOOL.exe from the extracted software folder to launch RuiXUTools.
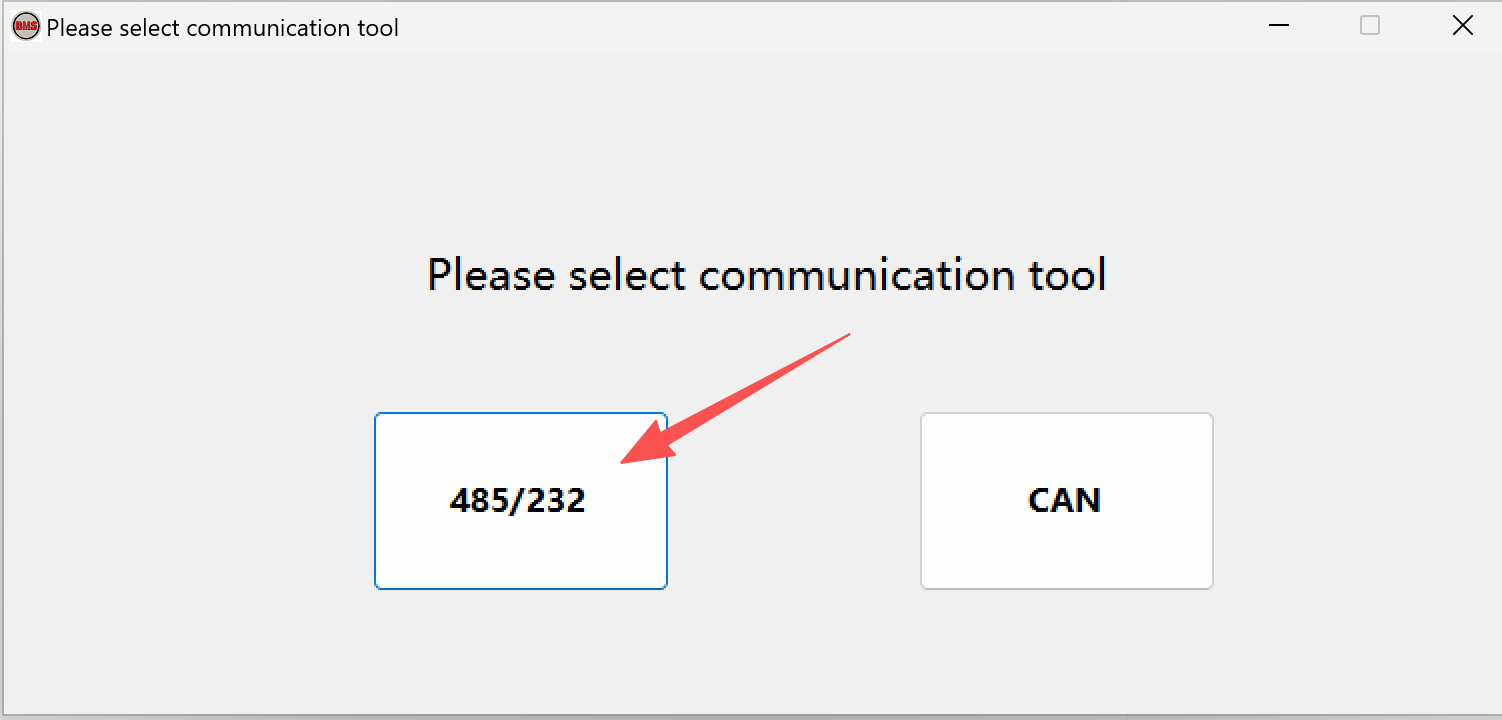
- When asked to select a communication tool, choose 485/232.
- Allow the initial battery-address search to finish.
- On Realtime Monitoring, select the adapter’s COM port, set Baud Rate to 9600, then click Open.
- Wait for battery voltage, SOC and other readings to appear. Check that the selected battery is the one you intend to update.
Checkpoint: You can read live battery data before proceeding to the firmware screen.
2. Install RX07
Step A — Stop real-time monitoring
On the monitoring screen, click Stop Monitor to stop live polling before reading or writing firmware. A customer found that monitoring had to be stopped for the firmware operation to work.
Step B — Read the current firmware
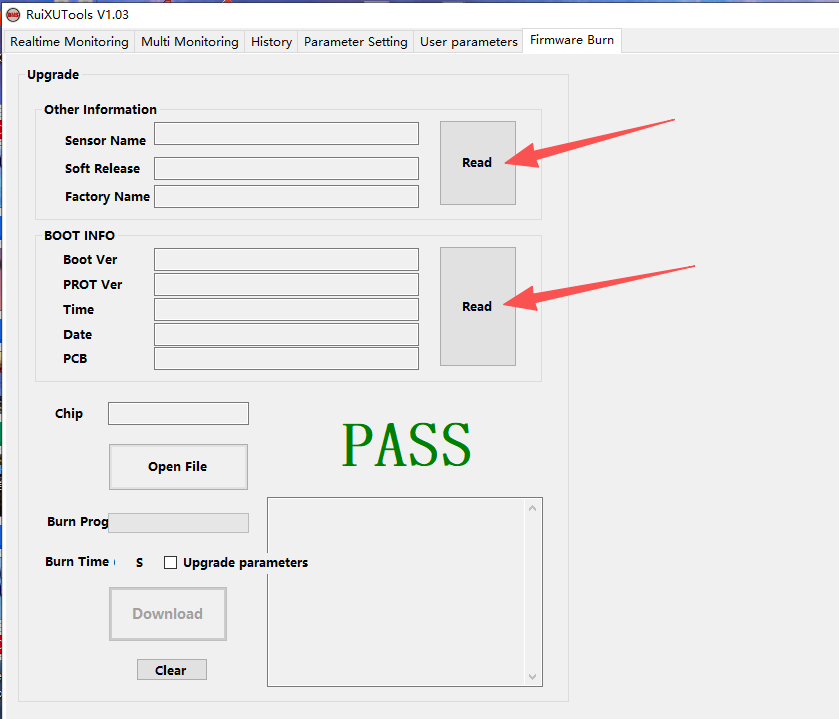
Open the Firmware Burn tab. Click the Read buttons beside Other information and BOOT INFO, as shown in the RUIXU instructions. Record the existing Soft Release value.
Step C — Select the RX07 file
- Click Open File.
- Browse to the folder where you saved the firmware.
- Select
APP_450300481_51V314AH_RX07.binand click Open in the Windows file picker. - Check that the selected filename ends in RX07.bin.
Open File selects the firmware. Download writes it to the battery. The Download button in RuiXUTools starts programming; it is not the website’s file-download button.
Step D — Start programming
Click Download on the Firmware Burn tab. Watch Burn Prog for progress and wait for the operation to finish.
Allow approximately 15 minutes per battery for firmware loading. One customer reported about five minutes for the master battery; setup and calibration take additional time.
Do not unplug the cable, let the laptop sleep or interrupt battery power during programming.
Step E — Confirm completion
Wait for the Successful upgrade message and the completed programming result. Some diagnostic text may appear in Chinese.
Check the final version as well: a PASS indicator can already be visible after earlier read operations, as it is in RUIXU’s screenshots. Confirm that the programming operation has completed, then read the battery version again in the next step.
Step F — Read the version again
Click Read beside Other information again. Confirm that Soft Release now shows RX07. Keep a photo or screenshot of the result for that battery.
3. Check the full battery bank and inverter setting
- Follow the prescribed restart and reconnection sequence. Restore the normal communication connections for your installation.
- Allow the battery list to repopulate. One customer initially saw only the master, with the other batteries reappearing a few minutes later.
- Read the version on each battery. Confirm RX07 separately for every unit. A battery reappearing in monitoring does not by itself show which firmware it is running.
- Check the inverter selection on the battery touchscreen. Open Settings → Inverter settings and confirm the correct inverter brand. For a Deye installation, use the Sol-Ark/Deye/Sunsynk selection shown in RUIXU’s instructions. One customer found this setting was RUIXU after updating and changed it to Deye.
- Confirm normal operation. Check that the inverter sees the expected battery count, receives battery data and shows normal charge/discharge operation without active alarms.
For a battery that still reports an earlier version, contact support for its update sequence before repeating the procedure.
Troubleshooting
No COM port appears
Check the USB cable connection and cable-driver installation in Windows Device Manager. The COM number may change if you use another USB socket.
The port opens but no battery data appears
Recheck the selected COM port, the 485/232 mode, the 9600 baud setting and the cable’s connection to the battery OUT port. Verify the connection against the instructions for your battery.
Firmware Read or Download does not work
Stop real-time monitoring, then check that you have selected the RX07 .bin file through Open File. Close other software using the same COM port.
The diagnostic messages are in Chinese
Watch the progress indicator and completion result, then re-read Soft Release to confirm RX07. If the operation reports an error, save a screenshot and contact support before retrying.
Only one battery is visible after the update
Allow time for communication to recover, then recheck the bank. Read each battery’s firmware version once it appears. If batteries remain missing, send support the battery count, serial numbers and screenshots.
SOC calibration after updating
RX07 was supplied by RUIXU to improve state-of-charge estimation. Installing the firmware and completing a full-charge calibration are separate steps.
- Arrange a charging window long enough for the battery bank to finish charging.
- Use the charging-current limit approved for your battery bank, inverter, wiring and supply.
- Let the normal charging process reach a genuine full-charge state at 100% and finish accepting charge.
- Check normal operation and monitor the SOC reading over subsequent cycles.
If charging stops because of an alarm or temperature restriction, contact support. Zero charging current alone does not show that the battery is full.
Why does SOC only rise about 50% during a free charging window?
The amount stored depends on charging power and time, site loads and losses. At a net 8 kW for two hours, approximately 16 kWh reaches the battery before storage losses—about half the nominal energy of a 32 kWh bank. Correcting the SOC reading does not increase the energy charged during that window.
Need help with the update?
Contact LiFePO4 Australia with your order details, battery serial numbers, existing firmware versions, inverter model and number of batteries. Include a screenshot of any error and the software version you are using.